Pages

Monday, September 29, 2014

Angelica's Trip to Europe!

Angelica has been invited by the People to People Student Ambassador Program to participate in a once in a lifetime trip to London and Paris!

Please read her letter and if you can help please use the paypal donation link below (please be aware that paypal will assess a 3% surcharge on every donation which is taken from the donation amount) or shoot me an message here and I can send you our address.

Dear Family and Friends,
I have been invited to go on an educational trip this next summer to Europe for 14 days as a People to People Student Ambassador. I am trying to raise 6,000 dollars (the cost of the trip).
If I go I will get to see Stonehenge, go on the London Eye,  visit Buckingham Palace, go to the top of the Eiffel Tower, visit the Arc de Triomphe, visit the Louvre, and much more. I want to go because I think it will be a good experience to learn about the different cultures. I also want to go because I would like to learn about the history of the area.
On the trip I hope to develop leadership skills and broaden my thinking about the world. Going on the trip will also help me in school. it can help get me into a collage and if I write essays about my trip or make presentations I can earn 120 hours of high school credit. If you can please send donations. Every bit counts.
                                                       Thanks,

                                                               Angelica

Saturday, July 19, 2014

Local Gems - Soil Born Farms

Soil Born Farms is a local farm nestled in the middle of the city of Rancho Cordova. Started in 2000 when two ambition but inexperienced organic farmers received permission from the landowner to farm her property in exchange for produce.

Currently they produce food for local purchase and to provide food for Loaves and Fishes, and other charities. They have apprenticeships which teach organic farming as well as numerous classes in various scales of farming, processing and utilizing the fruits of their labors and how to run your own small farm.

"The goal of the apprenticeship program at Soil Born Farms is to provide a training ground for aspiring farmers by teaching the basic concepts and practical applications of organic food production. It is also our goal to teach Apprentices to use agriculture as a platform to see how food systems tie into the larger social issues of food security, social justice, and public health."

Events and Class Schedule


I have personally taken several classes on the farm and have yet to be disappointed in the knowledge and friendliness of the staff and instructors there.

"This beginning farmer and gardener training program designed to provide knowledge and hands-on experience to the aspiring urban grower."

2140 Chase Dr, Rancho Cordova, CA 95670
(916) 363-9685

Mountain Rose Herbs. A herbs, health and harmony c

Friday, July 18, 2014

Herbal Glossary

Analgesic:  
relieves pain
Antioxidantprevents the production of harmful oxygen radicals. An antioxidant is an agent that inhibits or retards the oxidation of substances to which it is added.
AntisepticAn Antiseptic substance inhibits the growth and reproduction of micro-organisms. Antiseptic substances prevents putrefaction and infection. Generally speaking, an antiseptic substance is less effective than antibiotic substances in destroying specific bacteria but less invasive with generally less side effects.
AntispasmodicA substance that prevents or eases smooth muscle spasms. Examples of smooth muscle spasms are Digestive system spasms, Uterus spasms and Urinary tract spasms. (AKA Spasmolytic.)
Antiviral:Destructive to viruses. A substance that destroys or inhibits viruses in many ways. Evidence of antiviral properties in alternative (herbal and other) medicine is often anecdotal (as it is in conventional medicine) and not fully substantiated.
Carminative: A substance that relieves flatulence and abdominal distension. For the relief of discomfort and pain (cramps) associated with excessive build up of abdominal gas. It could also relieve gaseous distention of the abdomen and related painful spasms.
Cephalic: A substance that stimulates and clears the mind.
Diaphoreticpromotes perspiration (sweating)
Digestiveaids in the digestive process
DiureticCauses urine production. Release of water via urine.
Emmenagogue:Stimulates menstrual flow.
Expectorant:promotes the ejection of mucus (and other substances) from the lungs and other airways. Expectorants achieve this by reducing the viscosity of pulmonary secretions or by weakening the bond of these secretions to the walls of the lower respiratory tract.
Nervine:A nerve tonic, a medicine that acts therapeutically upon the nerves, particularly in the sense of a sedative that serves to calm ruffled nerves.
Sedative:a substance that has a calming effect, reducing nervous excitement. Sedatives calm, reduce irritability and reduce activity of some or all of the body's organs. Not all substances have the same sedative effect some affect specific organs while not calming others and often affect different people in different ways.
Spasmolyticable to relieve spasm of smooth muscle
Tonic:A general term that describes a substance that induces a feeling of well being to the body.
Vasodilator:gents that act as blood vessel dilators (vasodilators) and open vessels by relaxing their muscular walls.
Vulnerary: aid the healing of wounds (arrests bleeding and prevents tissue degeneration)


Mountain Rose Herbs. A herbs, health and harmony c

Thursday, July 17, 2014

The Garden Goes In - Part 2

"If you have a garden and a library, you have everything you need." ~ Marcus Tullius Cicero


"The glory of gardening: hands in the dirt, head in the sun, heart with nature. To nurture a garden is to feed not just on the body, but the soul." ~ Alfred Austin

There is an art to gardening that I feel surpasses my understanding... When I go to a museum, I don't sit and stare at any one thing for hours basking in the nuances of color, texture, medium, canvas, or stroke.... I look at something, determine almost immediately whether I like it or not, and unless there is something immensely interesting about it, I tend to move on in about 15 minutes or so.  I am not artistic or creative, and I rarely have the time or patience for detailed work.  When it comes to gardening, the plants either get tough or die...


That being said, I know the basics... plants like to be planted at certain times of the year, and "x" number of inches apart, etc. Armed with my handy dandy planting schedule specific for my area, because I am not clever enough or determined enough to pour through endless info about "zones" for each plant, etc. (just did an internet search and a few came up, so try that if you don't have one for your own area) I dug through the many different kinds of seeds I had purchased over the years, or received from my mother in law who had a seed of the month club.


Now remember when I said that while I am trying to get my life to as natural a state as possible, I don't always have the money or time to go around hunting for and purchasing organic everything... The same can be said for my seeds... these are things I already had and I don't waste much, however if you are just starting out I highly recommend looking for non-GMO seeds, and heirloom/organic seeds whenever possible. I do believe that these will yield higher quality and better for your foods, even though anything you grow at home yourself is already heaps better than anything you will buy in the supermarket, labeled organic or not.


According to my planting schedule, the only plants that should be planted in our area at this exact time of year (2nd half of July) is head lettuce... I have two varieties of old seeds which will probably not sprout, and one variety from my MIL that is new and should produce fine.  I have about 2 more weeks before the next seeds should go in the ground, and about 2 weeks (10-14 days) for the lettuce to spout, so whatever doesn't come up by then will get replaces with new crops... I figure that worked itself out nicely and I didn't even plan it that way! :)
 

Angel and I then planted several other plants using old seed start containers and egg cartons... We have carrots, beets, chard, kale, one butternut squash, and broccoli.


In a couple of weeks I will post about how the lettuce did, and how our transplants are coming along... I will also have other seeds to put in the ground... radishes, turnips, potatos, onions, and more...


Resources

https://www.ucdmc.ucdavis.edu/hr/wellness/_docs/planting_guide.pdf
http://ucanr.edu/sites/sacmg/files/117117.pdf
http://www.brainyquote.com/quotes/topics/topic_gardening.html#t9XjQ4XF0kBe5odi.99

Tuesday, July 15, 2014

Finally... the Garden goes in - Post #1

"There are blessings in being close to the soil, in raising your own food even if it is only a garden in your yard and a fruit tree or two. Those families will be fortunate who, in the last days, have an adequate supply of food because of their foresight and ability to produce their own." ~ Ezra Taft Benson


Finally started the garden this morning!! :)  Actually we built the boxes several months ago, but as with most of our projects life and distractions usually have us sidetracked. The boxes were built simply from scrap plywood and 2x4s in roughly 4x4 squars.  We wanted them tall to minimize bending over and crawling on hands and knees and also in an attempt to keep the crabgrass from completely taking over the soil.  


We have 4 of these larger squares and then set up one to be longer and lengthwise for the tomatoes so as to take full advantage of the full sun this area receives all day long.  In order to save money on soil, we had two strategies.  One was to fill the bottom of the planter boxes with straw bails.


Side note on straw bails... do NOT make the mistake of asking for hay bails.. they cost more than twice as much.  I found this out the hard way.  Our wedding was cowboy themed and our reception hall was to be decorated with straw bails. I had purchased them before to decorate for a Halloween party one time and they cost around $5 per bail, when I called for the wedding I accidentally asked for hay bails and they wanted $20+ per bail!!! I was in a panic because I didn't want to spend that much, even though I new I would be using it in the chicken coop later. I couldn't understand the huge difference, and it took a couple of phone calls before one of the vendors finally asked me what I wanted it for and kindly told me that I wanted STRAW bails not hay bails. :) It still makes Caveman laugh to this day because I didn't know there was a difference.


Another way we were going to save money and a reason why it took so long, was that Caveman had planned to buy the soil at a discount from a local company by a truckload full instead of spending more than double to buy bags from the store. While waiting on soil the sink in our kitchen began to leak something awful every time we ran the faucet and I got tired of treading on water puddles whenever the kids finished loading the dishwasher.  

Instead of putting a nice new sink in our crummy old counter, we began work on the kitchen remodel we had put off for 6 years.  Several weeks into that project and I really had no hand in it myself, so I told Caveman I was just going to buy enough dirt to fill one box so I could get SOMETHING of a garden started... Well as usually happens when I say I want to do something contrary to what Caveman had planned, things start moving forward! ha!


Here is our lovely pile of soil compost with two of our more lovely children industriously shoveling wheelbarrow after wheelbarrow load of the stuff and we dumped it into the first box.


We made the mistake of filling the first box without wetting any of the layers of soil... so learn from that mistake, because once we got it full it took allot of effort and mixing to get the water to sink in and drain properly. Rather it floated on the top for a bit and my son had to stab and stir the soil with a rank handle.


After that first box, I decided to water each layer of soil as they went into the boxes and that worked out much better. Caveman and my son raked out the layers as they went in and mixed the soil to get it all nice and moist and ready to take seeds and plants.


Actually, my sons fancies himself more of a supervisor, but he still did an exceptional amount of work. :) Everyone did so much work this morning.  It was really gratifying working along side my children and husband getting something accomplished together as a family that will benefit us all.


So, there you have it!  Garden soil is in and ready to go.  Going to plant some seeds tonight and see what we can still get out of this summer and looking forward to trying some winter crops.  If you have a home garden or small farm plot, please post your comments, and ideas below! :) Part 2 - The Planting coming soon!

"If you truly get in touch with a piece of carrot, you get in touch with the soil, the rain, the sunshine. You get in touch with Mother Earth and eating in such a way, you feel in touch with true life, your roots, and that is meditation. If we chew every morsel of our food in that way we become grateful and when you are grateful, you are happy." ~ Thich Nhat Hanh


Resources

http://www.brainyquote.com/quotes/quotes/e/ezrataftbe556162.html#bh3V0qDZJ15qidJJ.99
http://www.brainyquote.com/quotes/keywords/soil.html#wTulscMQZEH8ckyw.99

Saturday, July 12, 2014

Homemade Natural Deodorant Sticks!


 The Ingredients:

Directions:

I have a dedicated quart jar that I use as a makeshift double boiler.  That way I don't have to worry about messing up a good pot (mainly a problem when using Zinc for sunscreen), and I don't have to wash it because most ingredients for making lotions and bars are the same.  

So.. placing the jar in a pot with about an inch of water, add the beeswax, shea butter, and coconut oil and heat until completely melted. Stirring frequently.
Remove from heat and allow to cool slightly so as not to kill the probiotics when added.  

Add cornstarch, baking soda, probiotics, and any essential oils your using. (you can open the probiotics capsules by gently pinching and twisting apart the two haves of the capsule.)

Mix well.


Quickly poor/spoon mixture into molds or deodorant stick containers. Allow to cool for several hours before using.

Recipe as listed above made 4 sticks and a little extra. The sticks stay molded, but they will not be as solid as store bought deodorant.  You will need to only push up as much as you plan to use.

Purpose behind ingredients and Why it works!

Body odor is caused by bacteria which grows in the moist areas such as your under arms.
  • Both coconut oil and the essential oils suggested have natural antibacterial qualities which keep these little buggers from growing and smelling.  
  • The essential oils also have a pleasant smell that is good in and of itself. :)
  • Baking soda neutralizes the acids produced by the bacteria and help to maintain a normal PH under our arms which also controls smell
  • Corn Starch or Arrowroot powder (or other starch) absorbs sweat as well as the toxins that exit your body in your sweat.
  • Probiotics create a balance of beneficial bacteria to the body odor causing bacteria and help to maintain your body ph.
  • Shea butter and beeswax help create the solid deodorant form.

Mountain Rose Herbs. A herbs, health and harmony c

Natural Mosquito Repellent


Our family LOVES to go backpacking!  There is something to be said for hiking off into the woods getting away from it all (including other people) and roughing it.  The one thing I don't appreciate about backpacking is mosquitoes! It seems that the last few times we have gone, mosquitoes have been our biggest complaint... Maybe it is the drought we are in here in Cali, that leaves the water levels ripe for mosquitoes to breed, I don't know, but it has been a bug ridden season...


That being said, our main option for being mosquito free has just about always been DEET. While we have had no apparent adverse reactions to DEET, it is a chemical that can cause severe harm to humans.

"As a precaution, manufacturers advise that DEET products should not be used under clothing or on damaged skin, and that preparations be washed off after they are no longer needed or between applications.[16] DEET can act as an irritant;[4] in rare cases, it may cause severe epidermal reactions.[16]
In the DEET Reregistration Eligibility Decision (RED), the United States Environmental Protection Agency (EPA) reported 14 to 46 cases of potential DEET-associated seizures, including 4 deaths."


I have always had an aversion to DEET in principle, but hadn't found anything that worked equally well, or better.  Each time I put it on, I would give an inner cringe, knowing that I was putting poison on my body... I mean, anything that could melt clothing, wasn't something I was excited to put on my skin...

"DEET is an effective solvent,[4] and may dissolve some plastics, rayon, spandex, other synthetic fabrics, and painted or varnished surfaces including nail polish."


"Though DEET is not expected to bioaccumulate, it has been found to have a slight toxicity for coldwater fish such as rainbow trout[24] and tilapia,[25] and it also has been shown to be toxic for some species of freshwater zooplankton.[26] DEET has been detected at low concentrations in waterbodies as a result of production and use, such as in the Mississippi River and its tributaries, where a 1991 study detected levels varying from 5 to 201 ng/L.[27]"

So while browsing through the many articles and blogs on DIY natural home and personal care recipes I came across several options for making my own homemade mosquito spray. Most involved mixing a variety of essential oils with an alcohol or witch hazel base in a spray bottle.  Some called for straight lemon juice with water and alcohol, but I wasn't sure about spraying possibly sticky juice on myself.  I also wasn't to comfortable with spraying alcohol on my skin which can be drying and irritating, and I wanted to be able to spray on or near the face and hair as well. So even though I lack imagination, I had read that when making tinctures you can use both alcohol or vinegar as a menstruum, so I decided to use vinegar instead.


I also like to keep things as simple as possible so I omitted the water as well, but you could probably cut the vinegar 50/50 with water to both lighten the vinegar smell, and save a few pennies.

Here is a list of possible essential oils you could use in your blend.  I will give you mine below as I used what oils I had from this list, but you can experiment with others...

Mosquitoes – citronella, lemon eucalyptus, peppermint, lemon, eucalyptus, catnip, basil, clove, thyme, lemongrass, geranium, lavender
Fleas – cedarwood, citronella, eucalyptus, tea tree oil, lemongrass, lavender, orange, pine,
Ticks – rose geranium, juniper, rosewood, thyme, grapefruit, oregano


Ingredients:

  • 2 oz Vinegar (or 50/50 mix of water to vinegar, alcohol, or witch hazel)
  • 10 drops each essential oils
    • Eucalyptus
    • Lemon
    • Peppermint
    • Lavender
    • Basil

Directions:

Fill 2 oz spray bottle leaving just a little room (I used a salvaged perfume spritzer from my medicine cabinet that I hadn't used literally in years), or you can use an amber spritz bottle. Add the essential oils. Shake before each use.


Wellness Mama suggests using 30-50 drops of oil to 8 oz of liquid. Perhaps because I didn't use alcohol, but I found my 50 drops to 2 oz to be not quite effective enough against the hoards we dealt with on our last trip, but it did keep the majority at bay.  My daughter had 6 or more mosquitoes that maintained a perch on her pink hat.  No matter how many times we swiped at them they just hovered and then landed back on her hat again, so I finally got out the spray and spritzed her hat with it. The mosquitoes left it alone after that.  When they tried to bite through my pants I sprayed those as well and they stayed away, AND I didn't have to worry about melting my nylon quick dry pants, which was such a blessing. It also works great against the few mosquitoes we have around our house.

I have also since purchased a bug off blend that contains catnip in it, which I was excited to find out compared better than DEET in trials! I will report more on that when I get a chance to use it.

Wednesday, July 9, 2014

The Hen House


This is our chicken tractor. Yes it is on wheels and when Caveman made it (5 years ago) we could pull it around the yard so the chickens could have access to newer weeds and bugs and the area where they messed could air and dry out and grow new weeds. :)

Having chickens was Caveman's idea... having lived his young life raising animals for food, it was an experience he was eager to share with our own kids before they became too old to appreciate it. We started off with 5 chickens, 2 Dutch Welsummers, 1 Buff Orpington, and 2 Cinnamon Queens.  We had a Silky but I can't remember if that was from the first batch or the second...


We have gone through several incarnations of chicken demographics and coop locations.  Shortly after we started this project we discovered that they could be set free in the yard and left to their own devices.  They roosted and laid eggs in the coop but for the day they wondered the yard and ate bugs and weeds.

When I got my Aussie Sheppard Fergie, we discovered that aside from being a herding animal, she had an affinity for catching and eating chickens!! So.. for 2 years we had built them a bigger fenced in area that they could call their own, and also trained Fergie to not eat chickens by hitting her unceremoniously about the head with her last feathered meal which we were lucky enough to catch her with.  She didn't much care for that admonishment, and so has not eating a chicken since... (still haven't figured out how to keep her from the rabbits, as we are not inclined to sacrifice one for training purposes, so we keep them fences off... more on that project at a later time.)


Currently we have 36+ chickens, 11 of which are meat chickens which will jump into jars as soon as they are full grown, and whatever roosters are in the bunch will also be culled and we will keep all the new young egg layers, both White Leghorns and Buff Orpingtons. Probably 10 all together...


We have found the buffs to be exceptional layers and Caveman really wants a bunch of leghorns, presumably because they are also good layers, but I think mostly because he wants to be a chicken hawk...

Wednesday, July 2, 2014

Magnesium Oil


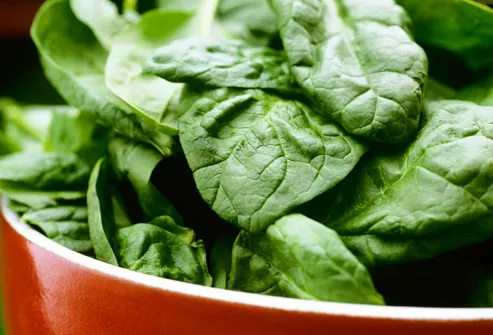
Magnesium is a very important mineral found in leafy greens, nuts, and legumes as well as other foods, yet most American still aren't getting enough dietary magnesium. According to one study magnesium deficiency combined with a high-fructose diet induces insulin resistance, hypertension, dyslipidemia, endothelial activation and prothrombic changes in combination with the upregulation of markers of inflammation and oxidative stress. Another study showed that bathing in a magnesium salt bath improved the hydration of the skin and reduced skin inflammation, redness and irritation.

Some of the many benefits and properties of magnesium are:

Energy and Muscle Production
  • Magnesium is necessary to breakdown the food we eat, particularly carbohydrate and fat into energy. It also allows the body to produce more Insulin-like Growth Factor (IGF-1), which is a major contributor to the growth and strength of muscles and is required by cells to produce ATP (adenosine triphosphate) the body’s main source of energy.
Muscle & Nerve Health
  • While approximately 60% of magnesium is found in bone structure, an important portion is found in the bloodstream (extracellular fluid) where it helps support proper muscle contractions and nerve health.
  • Relaxes the nervous system - Serotonin, which relaxes the nervous system and elevates mood, is dependent on Magnesium.
  • Better flexibility - Magnesium loosens tight muscles. Without Magnesium, muscles do not relax properly and cramps occur. Magnesium is important for flexibility, because low Magnesium results in a buildup of lactic acid, causing pain and tightness.
Hormone Health
  • Magnesium is also important in the production of thyroid hormones, adrenaline, and insulin, which are associated with carbohydrate and fat metabolism. Having these three hormones functioning properly is important for overall health, energy health and well-being.
Food Intake
  • Unfortunately, 59% of American adults do not consume adequate amount of this mineral. Common food sources of magnesium are: whole grains (brown rice, oat bran, whole wheat), dark green leafy vegetables, nuts and beans. If you do not consume enough of these magnesium-rich foods, a supplement may be beneficial.
Better sleep
  • The sleep regulating hormone melatonin is disturbed when Magnesium is deficient. Furthermore, Magnesium brings balance and controls stress hormones. Stress and tension are often reasons why people suffer from insomnia in the first place.
Bone integrity and strength
  • Magnesium helps to fix calcium properly. It may blow some people's mind that the calcium supplements they're taking are not only useless, but are actually contributing to osteoporosis! There are actually about eighteen essential nutrients that contribute to bone health; Magnesium is definitely one of the most essential, because it stimulates a particular hormone called calcitonin. And, it also suppresses a hormone called parathyroid that breaks down bone.
Remineralizes teeth
  • Magnesium deficiency causes an unhealthy balance of phosphorous and calcium in saliva, which damages teeth.
Alkalizes the body
  • Magnesium helps return the body’s pH balance. Magnesium reduces lactic acid, which is partly responsible for post-exercise pain (Delayed Onset Muscle Soreness).
Other benefits
  • Hydrates - Magnesium is a necessary electrolyte essential for proper hydration.
  • Helps to relieve constipation - Magnesium can be used to cleanse the bowels of toxins.
  • Enzyme function - Enzymes are protein molecules that stimulate every chemical reaction in the body. Magnesium is required to make hundreds of these enzymes work and assists with thousands of others.
  • Diabetes - Magnesium enhances insulin secretion, which facilitates sugar metabolism. Without Magnesium, glucose is not able to transfer into cells. Glucose and insulin build up in the blood, causing various types of tissue damage, including the nerves in the eyes.

Making your own magnesium oil is very simple.  I found the "recipe" if you can call 2 ingredients a recipe from here. However being the impulsive person that I am I purchased a different kind of magnesium than this recipe called for. YIKES!!  However, after doing more research I opted to use the magnesium options I had handy and with the same results.

Many of you are probably familiar with Epson Salt.  Until I began researching magnesium I was not aware the Epsom Salt was not made from sodium like table salt!  I know... but heh... cut me some slack... Until I took my chemistry class I had no idea that table salt wasn't the ONLY salt. sheesh!

At any rate, the magnesium I accidentally purchased was Magnesium Citrate powder which some folks had commented that it irritated their skin a bit.  Well I have never had overly sensitive skin, but I opted to mix my two magnesium sources 50/50 to minimize any sensitivities.  It is a regular recommendation for people to take Epson Salt baths, so this option is simply eliminating the need for a time consuming bath.

Ingredients:

(OR omit above two options and use 1/2 cup Magnesium Chloride)
1/2 cup water (distilled preferred, fluoride limits shelf life)

Directions:

Place the magnesium citrate and Epson salt in a glass bowl. Boil the water and pour over the powder mixture and stir until dissolved. Place in glass or plastic spray bottle and use daily spraying arms, legs and stomach about 10-20 sprays total.  You can moisturize 5 minutes after use and go about your day, or leave on for about 20 minutes and then shower to wash of residue.

This will feel sticky when you spray it on but dries without stickiness.

If you prefer to purchase your magnesium oil, you can do so here.

Leave a comment below if you have made magnesium oil or have used other magnesium supplements and what benefits you have found doing so.

References
Nature Made
Mind Body Green
Wellness Mama

Wednesday, June 25, 2014

Local Gems - Sacramento Food Co-op


I LOVE the Sacramento Food Co-op! I feel like I am not only supporting my own health by shopping there (whenever I can), but also that I am helping support a local community business focused on providing healthy and sustainable foods and products for those living in their community. The Co-op begain in 1973 as a food purchasing group. They expanded a couple of times over the years, and now have a store conveniently located in downtown Sacramento. Their purpose:

"To be a trusted source of natural foods and products, and a reliable resource for consumer information."

They have a great selection of natural, organic and grass-fed foods and products. Which is great! They also have a bulk herb section and an essential oils section which supplies most all of the essential oils for any projects on my blog.

BUT, probably my favorite thing about the co-op is all the great classes they offer.  From gardening, to fermenting, to growing your own foods, the co-op, partnering with other great places like Soil Born Farms, offers classes and reasonable rates.  If you are an owner at the co-op, which is like being a member or different ;), you get a discount on most all classes as well.

"2001 marked the year that we first opened the doors to our Co-op Community Learning Center, adjacent to the Sacramento store and home to cooking classes, health seminars and a variety of owner meetings and special events. We are committed to serving our Co-op owners and supporting our community through consumer education, owner meetings and events, outreach activities and charitable programs and projects."
I highly recommend checking them out if you haven't already! :)

Monday, June 23, 2014

Dry "Shampoo" - AKA No-Poo

Dry shampoo - sounds weird doesn't it?? When I first heard about this I thought, "that's crazy, it can't possibly work." But then I began my dive into all things (that I can manage) natural, I learned that it isn't not only possible, but it is better for your hair (which makes sense).

Our natural oils in our hair are their to help keep our scalp healthy and our hair strong and growing normally and naturally.  I had already embraced the idea of going two and sometimes 3 days between shampoos. People I have read about on other blogs go even longer or simply do not wash their hair in the traditional (commercial) sense at all. In fact, many commercial companies have come up with their own version of Dry Shampoo in order to keep up with the growing trend of waiting between lathering.

It seemed only natural for me to make the leap and give the dry shampoo a try, however I wasn't out to spend allot of money on chemical dry shampoos in pressurized cans. In fact, while researching I found that one of the ingredients in the homemade dry shampoos was corn starch... I wasn't sure I had some, but I had tapioca starch and didn't know if that would substitute well.  I actually found my corn starch, but then saw that Herbal Essence makes their commercial dry shampoo using tapioca starch! go figure!

Not only is it better for your hair to wait between washing, and to limit the amount of chemicals we use to strip our hair of its natural defenses, the idea of dry shampoo appealed to me from a preparedness perspective. What if there was an emergency or other event that limited our availability of fresh water. Some practiced alternative cleanliness methods would be great to have in our survival tricks.

At any rate, the recipe I ended up choosing was from... you guessed it... Wellness Mama! She has a couple of versions of her dry shampoo, including a spray version (which is not so much dry, but works the same way).  I chose the version for darker hair, since that's what I have, but then I modified it for red hair using cinnamon.  I tell you what... I smell absolutely YUMMY right now! :)

Ingredients for Red Hair:
  • 2 Tbls Corn Starch (or Tapioca Starch, or Arrowroot Powder)
  • 1 Tbls Cocoa Powder
  • 1 Tbls Cinnamon

Ingredients for Dark Hair:
  • 2 Tbls Corn Starch (or Tapioca Starch, or Arrowroot Powder)
  • 2 Tbls Cocoa Powder

Ingredients for Light Hair:
  • 4 Tbls Corn Starch (or Tapioca Starch, or Arrowroot Powder)
  • 5 Drops Essential Oil (Optional)
If using multiple ingredients you want to combine them before putting in your container.  I chose a spice jar with a cap so that my dry shampoo will be protected, on my bathroom sink, from any shower steam.

Once combined I used a funnel and small stick to get the powder into the spice jar.  I then shook the contents onto my scalp separating the hair line occasionally and working the powder onto my hair. I did this all over my head.


Here is a before pic of my oily hair.  It has been 3 days since I shampooed. You can see that it is shiny, and the strands kinda hang out together up there...

Once you have the dry shampoo worked into your hair well, you want to let it sit for at least a couple of minutes to let the powder absorb the excess oils in your hair.  Then you can shake, brush, or comb it out.

Here is the after pic.  You can see that my hair is no longer shiny/oily looking and the strains are separated and look more fluffy. (The color difference is due to the lighting differences of the location where I took the photos: above-Kitchen, below-bathroom)
It is my understanding that getting you and your hair used to using the dry shampoo is a bit of an adjustment period.